React-Native Animated ScrollView Row Swipe Actions

Introduction
Have you ever wanted to swipe a row in a scroll view to take some sort of action. Swipe left to delete, swipe right to archive, swipe to do whatever. Well previously without the Animated API that wasn't necessarily hard it was just inefficient due to having to use setState causing a lot of diffs.
What are we trying to accomplish

This is not an orignal interaction I created, you can follow along with how I stumbled upon it and such here https://github.com/facebook/react-native/issues/2072.
Swiping rows is also just a normal action in iOS. However there is an ongoing debate here about ListView/ScrollView being wrapped in a UITableView which would provide some of this interaction as default. You can read through it here https://github.com/facebook/react-native/issues/332 but we'll forge ahead and implement it with what we have to work with.
The Concept
Previously I attempted, and successfully implemented this with the PanResponder. There is nothing particularly bad about that approach except you will run into issues being embedded in a ScrollView.
What issues? Well while swiping left/right the content direction locks won't be set, which means if you don't swipe perfectly left < = > right and introduce some up/down your row will get stuck. That is not a good interaction.
So thanks to the solid recommendation by sahrens we will do a ScrollView with each row being a Horizontal ScrollView. This means iOS will negotiate content direction locks correctly. So when you scroll up and down the body content will scroll, left and right will cause each row to slide.
Drawbacks
There are some drawbacks.
- With the horizontal ScrollView you have to define the height (at least from what I could figure out).
- The View in the horizontal ScrollView does not stretch completely regardless of what flex properties you add on it.
- The PanResponder vs ContentOffset X values are opposites, so you have to multiply by -1.
- The content offset is not as large as the PanResponder so I had to lower the RED threshold.
Specifying the height is seemingly the largest drawback that I couldn't figure out. The width not auto-adjusting is also another drawback, however we have the dimensions to calculate the threshold so we could manually set the width if we wanted.
Setup
Variables we need
var React = require("react-native");
var Dimensions = require("Dimensions");

var { width, height } = Dimensions.get("window");

var { AppRegistry, StyleSheet, ScrollView, View, Text, Animated } = React;

var GREY = 0;
var GREEN = 1;
var RED = 2;

var values = [1, 2, 3, 4];

var AnimatedScrollView = Animated.createAnimatedComponent(ScrollView);
We need the Device widths for calculating half the screen later for our events. Also we setup color as integer steps, and then define arbitrary values for rows.
Finally we use the createAnimatedComponent supplied by Animated to create an Animated capable ScrollView.
What that means is that when you pass it interpolated values (like an interpolated background color) it'll correctly negotiate the values.
Styles
var styles = StyleSheet.create({
  container: {
    flex: 1,
    flexDirection: "column",
  },
  outerScroll: {
    flex: 1,
    flexDirection: "column",
  },
  row: {
    flex: 1,
  },
});
Just some base styles, you'll see where they are used in a second.
Basic ScrollView
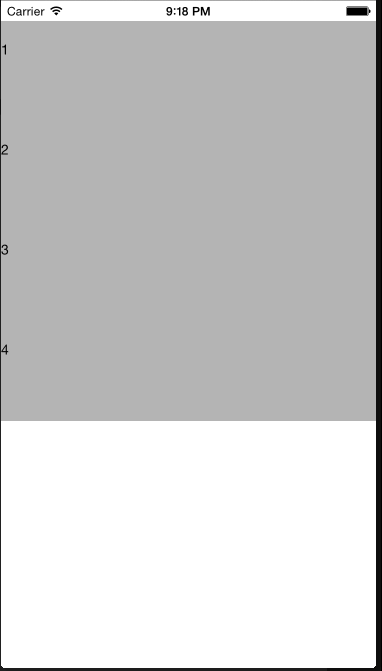
var AnimatedFlick = React.createClass({
  getInitialState: function () {
    return {
      values: values,
    };
  },

  _renderRow: function (value, index) {
    return (
      <View style={styles.row} key={index}>
        <Text>{value + "  <----- Slide the row that way and release"}</Text>
      </View>
    );
  },
  render: function () {
    return (
      <View style={styles.container}>
        <ScrollView style={styles.outerScroll}>
          {this.state.values.map(this._renderRow, this)}
        </ScrollView>
      </View>
    );
  },
});
We setup some intial state the values we set in the setup section var values = [1,2,3,4].
We map those values to the _renderRow function, which we just return a basic View, with some Text.
ScrollView with Horizontal ScrollViews
  _renderRow: function(value, index) {
    return (
        <View
          style={styles.row}
          key={index}
        >
          <ScrollView
            horizontal={true}
            directionalLockEnabled={true}
            style={{flex: 1, height: 100, backgroundColor: '#CCC'}}
          >
            <View>
              <Text>{value + "  <----- Slide the row that way and release"}</Text>
            </View>
          </ScrollView>
        </View>
    )
  }
We wrap our view content in ScrollView with horizontal true and directionalLockEnabled. This means when you start scroll one direction it will lock that direction and not let you scroll a different way. In our case once you start swiping left/right you can only swipe left/right.
Back to point 1, we have to set the height specifically here.
This is what we have now.
Animate the Background Color
  _renderRow: function(value, index) {

    var bgColor = this.state.colors[index].interpolate({
      inputRange: [
        GREY,
        GREEN,
        RED
      ],
      outputRange: [
        'rgb(180, 180, 180)', // GREY
        'rgb(63, 236, 35)', // GREEN
        'rgb(233, 19, 19)', // RED
      ],
    });

    return (
        <View
          style={styles.row}
          key={index}
        >
          <AnimatedScrollView
            horizontal={true}
            directionalLockEnabled={true}
            style={[{flex: 1, height: 100}, {backgroundColor: bgColor}]}
            onScroll={this._animateScroll.bind(this, index)}
            scrollEventThrottle={16}
          >
            <View style={{flex: 1}}>
              <Text>{value + "  <----- Slide the row that way and release"}</Text>
            </View>
          </AnimatedScrollView>
        </View>
    )
  },
We need to create an interpolation. How the interpolation works is given a value, in our case colors that are just an array of values [0,1,2] will return a new value which corresponds to the outputRange. So when the this.state.colors[index] value is 0 it will return GREY or rgb(180, 180, 180), and so on and so forth. When it changes from GREY to GREEN it'll animate to the new color of rgb(63, 236, 35).
This is where we use the AnimatedScrollView we created before. This will correctly take the animated value we pass in a grab the interpolatd background.
We pass in a function to onScroll and setup the scrollEventThrottle with the default value. This means our scroll event will be called every 16 milliseconds.
  _animateScroll: function(index, e) {
    var threshold = width / 5;
    var x = e.nativeEvent.contentOffset.x;
    var target = null;

    x = x * -1;

    if (x > -50 && this._target != GREY) {
      target = GREY;
    } else if (x < -50 && x > -threshold && this._target != GREEN) {
      target = GREEN;
    } else if (x < -threshold && this._target != RED) {
      target = RED;
    }

    if (target !== null) {
      this._target = target;
      this._targetIndex = index;

      Animated.timing(this.state.colors[index], {
        toValue: target,
        duration: 180,
      }).start();
    }

  },
We get the threshold of the deviceWidth we got at the creation of the app. We get the x offset of the scrollView. Finally depending on which direction you want users to swipes to take action we need to multiply ( or not ) by -1. The -1 means swiping right to left will cause the actions to trigger.
We setup various thresholds to animate to. Start is GREY, middle threshold is GREEN and anything greater is RED.
Finally if target isn't null (aka someone did something), we trigger an Animated.timing on our color. This will say for the next 180 milliseconds transition to our target color. This will cause our color interpolation to kick in and transition the background.
Hopefully this all doesn't seem too complicated. We are essentially saying "If someone swipes this far make the background color this one".
Take an action
    return (
        <View
          style={styles.row}
          key={index}
        >
          <AnimatedScrollView
            horizontal={true}
            directionalLockEnabled={true}
            style={[{flex: 1, height: 100}, {backgroundColor: bgColor}]}
            onScroll={this._animateScroll.bind(this, index)}
            scrollEventThrottle={16}
            onMomentumScrollBegin={this.takeAction}
          >
            <View style={{flex: 1}}>
              <Text>{value + "  <----- Slide the row that way and release"}</Text>
            </View>
          </AnimatedScrollView>
        </View>
    )
  },
We do have to dig through the internal code a bit but a seemingly undocumented action of the ScrollResponder is the onMomentumScrollBegin. From the code comments this function is called when When releasing the view starts bouncing back. So the user has released, and the row is about to scroll back into the 0 position.
Why this action? Well we setup things to operate on the scroll actions. Any other event would cause the actions the user want to take to be wrong since the onScroll events will be fired when the user releases.
We should add some protection code and such, but you can implement that.
  takeAction: function() {
    this.setState({
      action: true
    });
  },
Here we just are causing a re-render so our app updates with the state below. However in this particular method you would actually take an action based upon the offset the person swiped to.
  getActionText: function() {
    var actionText = '';

    if (this.state.action) {
      if (this._target == GREEN) {
        actionText = 'Save Action';
      } else if (this._target == RED) {
        actionText = 'Delete Action'
      } else {
        actionText = 'No Action';
      }

      return 'You took "' + actionText + '" on the ' + this._targetIndex + ' row';
    }

    return 'You have not taken an action yet';
  },
Just determining text to show to the user.
Final code
This is a pretty nice technique, and some what simple to implement but as mentioned it has some drawbacks.
var React = require("react-native");
var Dimensions = require("Dimensions");

var { width, height } = Dimensions.get("window");

var { AppRegistry, StyleSheet, ScrollView, ListView, View, Text, Animated } =
  React;

var GREY = 0;
var GREEN = 1;
var RED = 2;

var values = [1, 2, 3, 4];

var AnimatedScrollView = Animated.createAnimatedComponent(ScrollView);

var AnimatedFlick = React.createClass({
  getInitialState: function () {
    return {
      values: values,
      colors: values.map(() => new Animated.Value(GREY)),
    };
  },
  _animateScroll: function (index, e) {
    var threshold = width / 5;
    var x = e.nativeEvent.contentOffset.x;
    var target = null;

    x = x * -1;

    if (x > -50 && this._target != GREY) {
      target = GREY;
    } else if (x < -50 && x > -threshold && this._target != GREEN) {
      target = GREEN;
    } else if (x < -threshold && this._target != RED) {
      target = RED;
    }

    if (target !== null) {
      this._target = target;
      this._targetIndex = index;

      Animated.timing(this.state.colors[index], {
        toValue: target,
        duration: 180,
      }).start();
    }
  },
  takeAction: function () {
    this.setState({
      action: true,
    });
  },
  getActionText: function () {
    var actionText = "";

    if (this.state.action) {
      if (this._target == GREEN) {
        actionText = "Save Action";
      } else if (this._target == RED) {
        actionText = "Delete Action";
      } else {
        actionText = "No Action";
      }

      return (
        'You took "' + actionText + '" on the ' + this._targetIndex + " row"
      );
    }

    return "You have not taken an action yet";
  },
  _renderRow: function (value, index) {
    var bgColor = this.state.colors[index].interpolate({
      inputRange: [GREY, GREEN, RED],
      outputRange: [
        "rgb(180, 180, 180)",
        "rgb(63, 236, 35)",
        "rgb(233, 19, 19)",
      ],
    });

    return (
      <View style={styles.row} key={index}>
        <AnimatedScrollView
          horizontal={true}
          directionalLockEnabled={true}
          style={[{ flex: 1, height: 100 }, { backgroundColor: bgColor }]}
          onScroll={this._animateScroll.bind(this, index)}
          scrollEventThrottle={16}
          onMomentumScrollBegin={this.takeAction}
        >
          <View style={{ flex: 1 }}>
            <Text>{value + "  <----- Slide the row that way and release"}</Text>
          </View>
        </AnimatedScrollView>
      </View>
    );
  },
  render: function () {
    return (
      <View style={styles.container}>
        <ScrollView style={styles.outerScroll}>
          {this.state.values.map(this._renderRow, this)}
        </ScrollView>
        <Text>{this.getActionText()}</Text>
      </View>
    );
  },
});

var styles = StyleSheet.create({
  container: {
    flex: 1,
    flexDirection: "column",
  },
  outerScroll: {
    flex: 1,
    flexDirection: "column",
  },
  row: {
    flex: 1,
  },
});

AppRegistry.registerComponent("AnimatedFlick", () => AnimatedFlick);