Multi List Drag and Drop With react-beautiful-dnd, Immer, and useReducer

Setup the Project
To get started right away clone this repository here https://github.com/codedailyio/NextJsDrag and follow along.
If you're just getting a project going start by adding react-beautiful-dnd
yarn add react-beautiful-dnd
The 3 components we'll need from react-beautiful-dnd are below. Each one serves a different purpose. DragDropContext specifies the area in which you can render the 2 other drag and drop components.
import { DragDropContext, Draggable, Droppable } from "react-beautiful-dnd";
The DragDropContext accepts various functions like onDragStart, onDragUpdate, and the one that is required is onDragEnd. The onDragEnd callback will be the final result of where the user has dragged an item, or if the user has cancelled the drag which is equally as important.
const Index = () => {
  const onDragEnd = useCallback((result) => {}, []);

  return (
    <div className={css(tw`flex flex-row h-screen p-4`)}>
      <DragDropContext onDragEnd={onDragEnd}></DragDropContext>
    </div>
  );
};
export default Index;
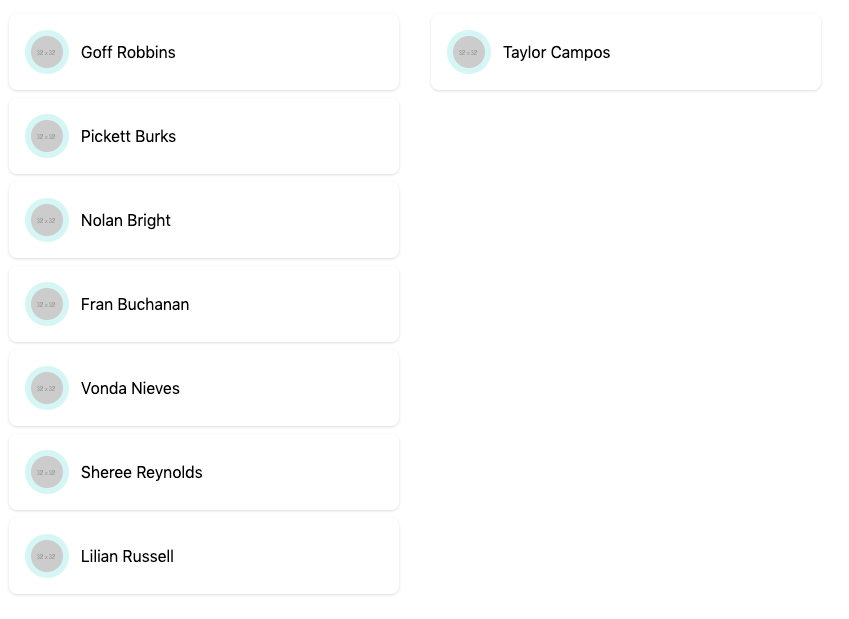
Our data doesn't really matter but our data structure is basically an array of information. It has an id for identifying each drag item which is important, a picture to show and a name.
[
  {
    id: "5f832341cc119a50d1adb972",
    picture: "http://placehold.it/32x32",
    name: {
      first: "Goff",
      last: "Robbins",
    },
  },
];
To hold onto our data lets use the useReducer. This will allow us to work with a singular list, but also setup us up for multiple lists that can be managed with a singular update.
To start just because we want data to render, we will have our dragReducer that is passed to useReducer just return the data that it receives. So we structure our initial state as { items: data } which is just our array of people.
const dragReducer = (state, action) => {
  return state;
};

const Index = () => {
  const [state, dispatch] = useReducer(dragReducer, {
    items: data,
  });

  const onDragEnd = useCallback((result) => {}, []);

  return (
    <div className={css(tw`flex flex-row h-screen p-4`)}>
      <DragDropContext onDragEnd={onDragEnd}></DragDropContext>
    </div>
  );
};
export default Index;
Styling (optional)
All of our styling is done with a tailwind + emotion combination. You can use any styling you want, normal classses, or any other css-in-js library. We setupi a few different bits, the draggers, drop containers, some drag content, then some dynamic classnames to apply when dragging an item/dragging over lists.
const styles = {
  dragger: css(
    tw`px-4 py-4 my-2 transition-colors duration-150 ease-in-out bg-white rounded-lg shadow hover:bg-gray-100`
  ),
  dropper: css(tw`w-auto px-4 min-w-1/4 max-w-1/2`),
  draggerContent: css(tw`flex items-center space-x-3 text-base`),
  draggerIcon: css(
    tw`inline-flex items-center justify-center rounded-full p-1.5 text-white bg-teal-100 text-teal-700`
  ),
  dragging: css(tw`bg-gray-300`),
  dropOver: css(tw`bg-gray-100`),
};
Droppable
Now we need to setup our Droppables. These need to go inside of the DragDropContext. The Droppable takes an id as well as a type. The id must be unique across all Droppables, and additionally the type allows us to limit what other items can be accepted. If we created another list with type PERSON this list would be able to drag items to it and vice versa.
A Droppable doesn't create an HTMl element, so you need to use a the child as a function pattern, and attach the Droppable ref, as well as provided.droppableProps onto the element that you want to be created as the droppable area.
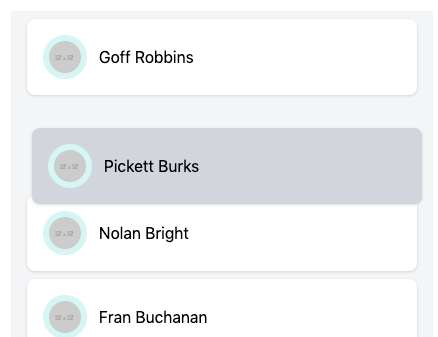
While dragging and dropping the snapshot will update with new values that can allow you to respond to a users actions. So for example in our case if a user is dragging over this particular Droppable the snapshot.isDraggingOver will be set to true. Which allows us to add in our dropOver className that will turn the background of our list dark.
Finally we need to render a provided.placeholder. This item is a React element that allows react-beautiful-dnd to create space for when a drag is occurring. Essentially allow the library to do what it needs to provide the optimal drag experience.
return (
  <div className={css(tw`flex flex-row h-screen p-4`)}>
    <DragDropContext onDragEnd={onDragEnd}>
      <Droppable droppableId="items" type="PERSON">
        {(provided, snapshot) => {
          return (
            <div
              ref={provided.innerRef}
              {...provided.droppableProps}
              className={cx(
                styles.dropper,
                snapshot.isDraggingOver && styles.dropOver
              )}
            >
              {provided.placeholder}
            </div>
          );
        }}
      </Droppable>
    </DragDropContext>
  </div>
);
Draggable
The previous snapshot was a bit of a preview for what is to come. Now we need to create a list of Draggable items to render inside of our Droppable list.
The data items we have contain a unique id which we need to use to identify the Draggable. This draggableId needs to be unique across all Droppables and Draggables. So if you are rendering the same items in separate lists you will need to add additional identification.
Then finally an index which is just the order that it is organized inside of the Droppable.
Just like our Droppable no element is created by the library, which means we need to supply the provided.draggableProps and additionally provided.dragHandleProps to the items we want dragged / the the things we want to initiate the drag.
In our case the drag item and the drag handle are the same so we spread the props onto the same element.
Finally we have a snapshot.isDragging that indicates if the item is dragging or not and allows us to supply a darker background style.
<Draggable key={person.id} draggableId={person.id} index={index}>
  {(provided, snapshot) => {
    return (
      <div
        className={cx(styles.dragger, snapshot.isDragging && styles.dragging)}
        ref={provided.innerRef}
        {...provided.draggableProps}
        {...provided.dragHandleProps}
      >
        <div className={styles.draggerContent}>
          <img src={person.picture} className={styles.draggerIcon} />
          <span>
            {person.name.first} {person.name.last}
          </span>
        </div>
      </div>
    );
  }}
</Draggable>
Here is our items rendering in a complete list. We pull the state.items off of our reducer. This is the initial data that we passed in. We use the ?. to indicate that the value might not exist so don't attempt to call map on it.
<Droppable droppableId="items" type="PERSON">
  {(provided, snapshot) => {
    return (
      <div
        ref={provided.innerRef}
        {...provided.droppableProps}
        className={cx(
          styles.dropper,
          snapshot.isDraggingOver && styles.dropOver
        )}
      >
        {state.items?.map((person, index) => {
          return (
            <Draggable key={person.id} draggableId={person.id} index={index}>
              {(provided, snapshot) => {
                return (
                  <div
                    className={cx(
                      styles.dragger,
                      snapshot.isDragging && styles.dragging
                    )}
                    ref={provided.innerRef}
                    {...provided.draggableProps}
                    {...provided.dragHandleProps}
                  >
                    <div className={styles.draggerContent}>
                      <img
                        src={person.picture}
                        className={styles.draggerIcon}
                      />
                      <span>
                        {person.name.first} {person.name.last}
                      </span>
                    </div>
                  </div>
                );
              }}
            </Draggable>
          );
        })}
        {provided.placeholder}
      </div>
    );
  }}
</Droppable>

Move the items
When dealing with lists it is beneifcial to have immutable data structures. This allows for the ability for more efficient rendering. This can be cumbersome to implement with a ... spread operator. So enterimmer , it provides a way to maintain immutability while leveraging normal mutation methods like splice.
import produce from "immer";
We need to use the produce method from immer which if passed a function will then prime the reducer to receive state, and return the new state. Notice we are provide a draft , which we can operate on. We do not need to return the draft as immer uses Proxies and is tracking every call that is being made.
In our case we check if the draft has an array for the from otherwise we assign a new [] to it. Same for the to.
Then we remove the item from the from list and insert it onto the to list both using splice.
const dragReducer = produce((draft, action) => {
  switch (action.type) {
    case "MOVE": {
      draft[action.from] = draft[action.from] || [];
      draft[action.to] = draft[action.to] || [];
      const [removed] = draft[action.from].splice(action.fromIndex, 1);
      draft[action.to].splice(action.toIndex, 0, removed);
    }
  }
});
We don't need to do anything here, our dragReducer combo with useReducer stays exactly the same.
const [state, dispatch] = useReducer(dragReducer, {
  items: data,
});
We need to adjust our onDragEnd to respond to changes based upon the user dragging. The onDragEnd will be called with a result that matches this structure.
{
  "draggableId": "5f832341ef54dda7b80930da",
  "type": "PERSON",
  "source": {
    "index": 2,
    "droppableId": "items"
  },
  "reason": "DROP",
  "mode": "FLUID",
  "destination": {
    "droppableId": "items",
    "index": 3
  },
  "combine": null
}
So with this payload, we can verify that the reason for the drop was actually a drop a not the user cancelling. If we don't have a destination then do nothing.
Then we can dispatch the MOVE action we setup in our reducer. The from list is the key of the array we want to move from and in our case it's items and the destination is the same list of items. We also have the indexes from both the source and destination to move to.
The droppableId of the destination and source are both coming from the <Droppable droppableId="items"/> props.
const onDragEnd = useCallback((result) => {
  if (result.reason === "DROP") {
    if (!result.destination) {
      return;
    }
    dispatch({
      type: "MOVE",
      from: result.source.droppableId,
      to: result.destination.droppableId,
      fromIndex: result.source.index,
      toIndex: result.destination.index,
    });
  }
}, []);
More than 1 Droppable List
With our dragReducer source and destination being dynamic and based upon the droppableId this allows us to create any number of lists at will.
<Droppable droppableId="items" type="PERSON">
	{/* All the Draggable code */}
</Droppable>
<Droppable droppableId="items2" type="PERSON">
	{/* All the Draggable code */}
</Dropppable>
Additionally we need to adjust the render from state.items to match the droppableId so
{
  state.items2?.map((person, index) => {
    // Render all draggables
  });
}