Scale
Scale is a way to animate the size of an element. It can be used to increase or decrease the size. What it's actually doing is defining how much to scale the coordinates. That means you can define the scale of x and y independently to have non-linear scaling. Scale defaults to 1 for both x and y. This just means scale to the size you have defined by your layout.
The scale will transform from the center of the element. That means if you scale X it will scale on the left/right sides evenly. Lets look at an example.
export default class animations extends Component {
  render() {
    return (
      <View style={styles.container}>
        <View>
          <View style={styles.box} />
        </View>
      </View>
    );

  }
}

const styles = StyleSheet.create({
  container: {
    flex: 1,
    alignItems: "center",
    justifyContent: "center",
  },
  box: {
    width: 100,
    height: 100,
    backgroundColor: "tomato",
    transform: [
      {
        scaleX: .5
      }
    ]
  }
});
}
If we scale by .5 on just the X side we will scale towards the middle evenly, removing 25 from both sides. We can see below that our wrapping View still maintains the layout of 100x100. However when we actually select our box we can see that it's measurements is 50. We know it's 50 because we can just take 100 for the width and multiply it by .5, 100 * .5 = 50.
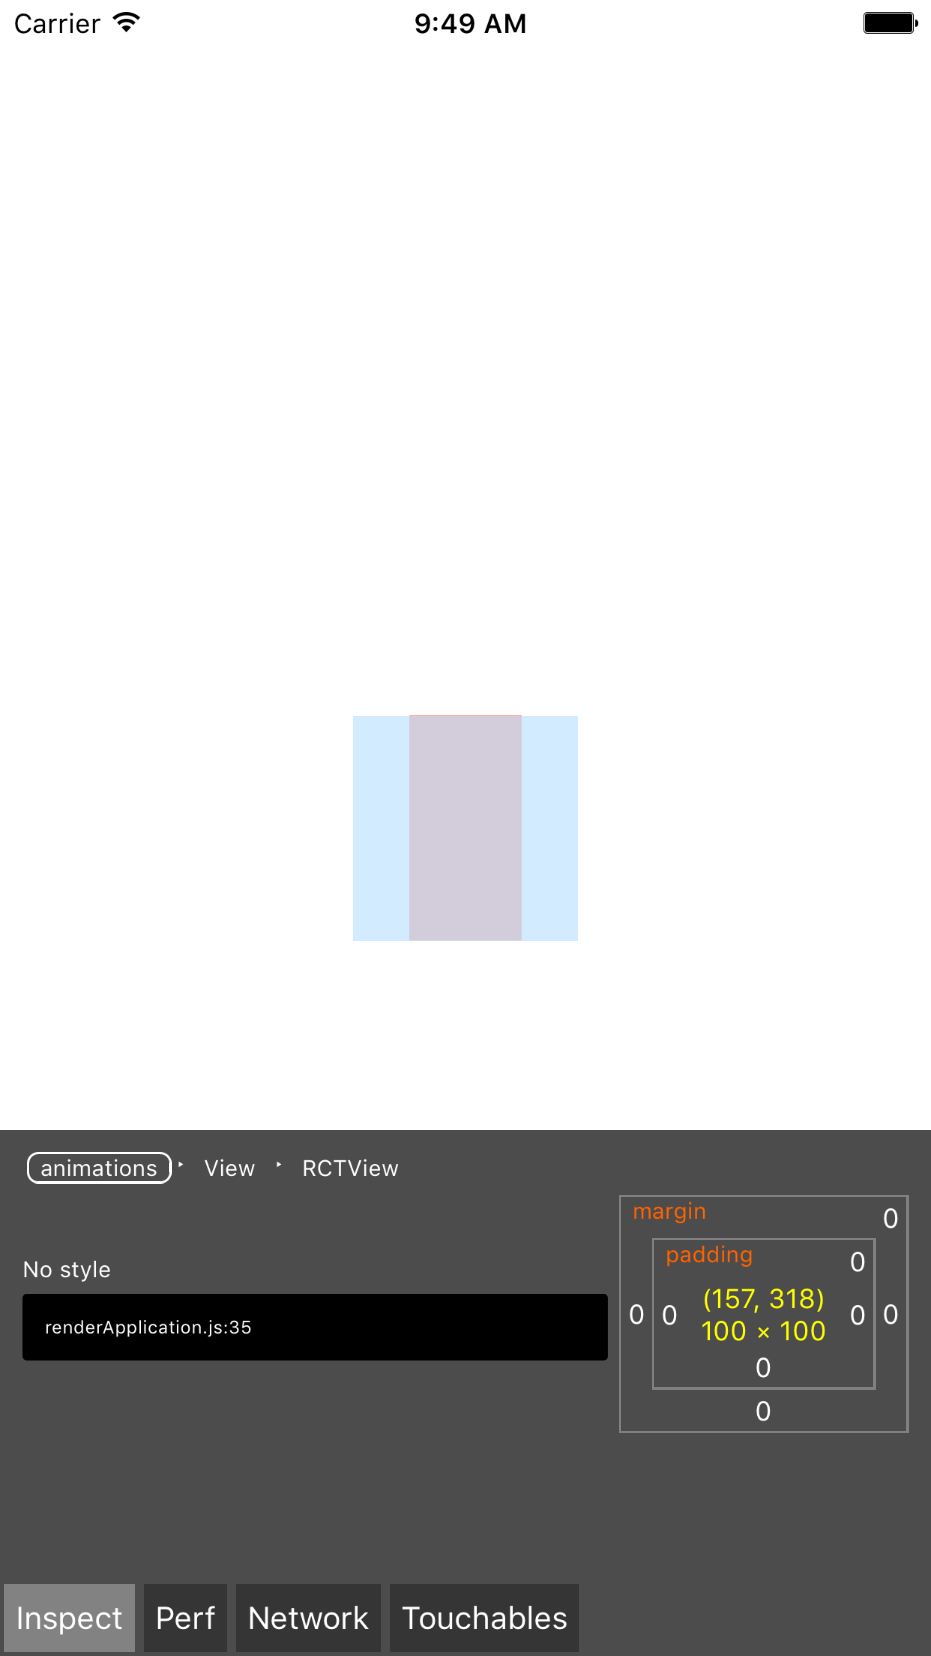
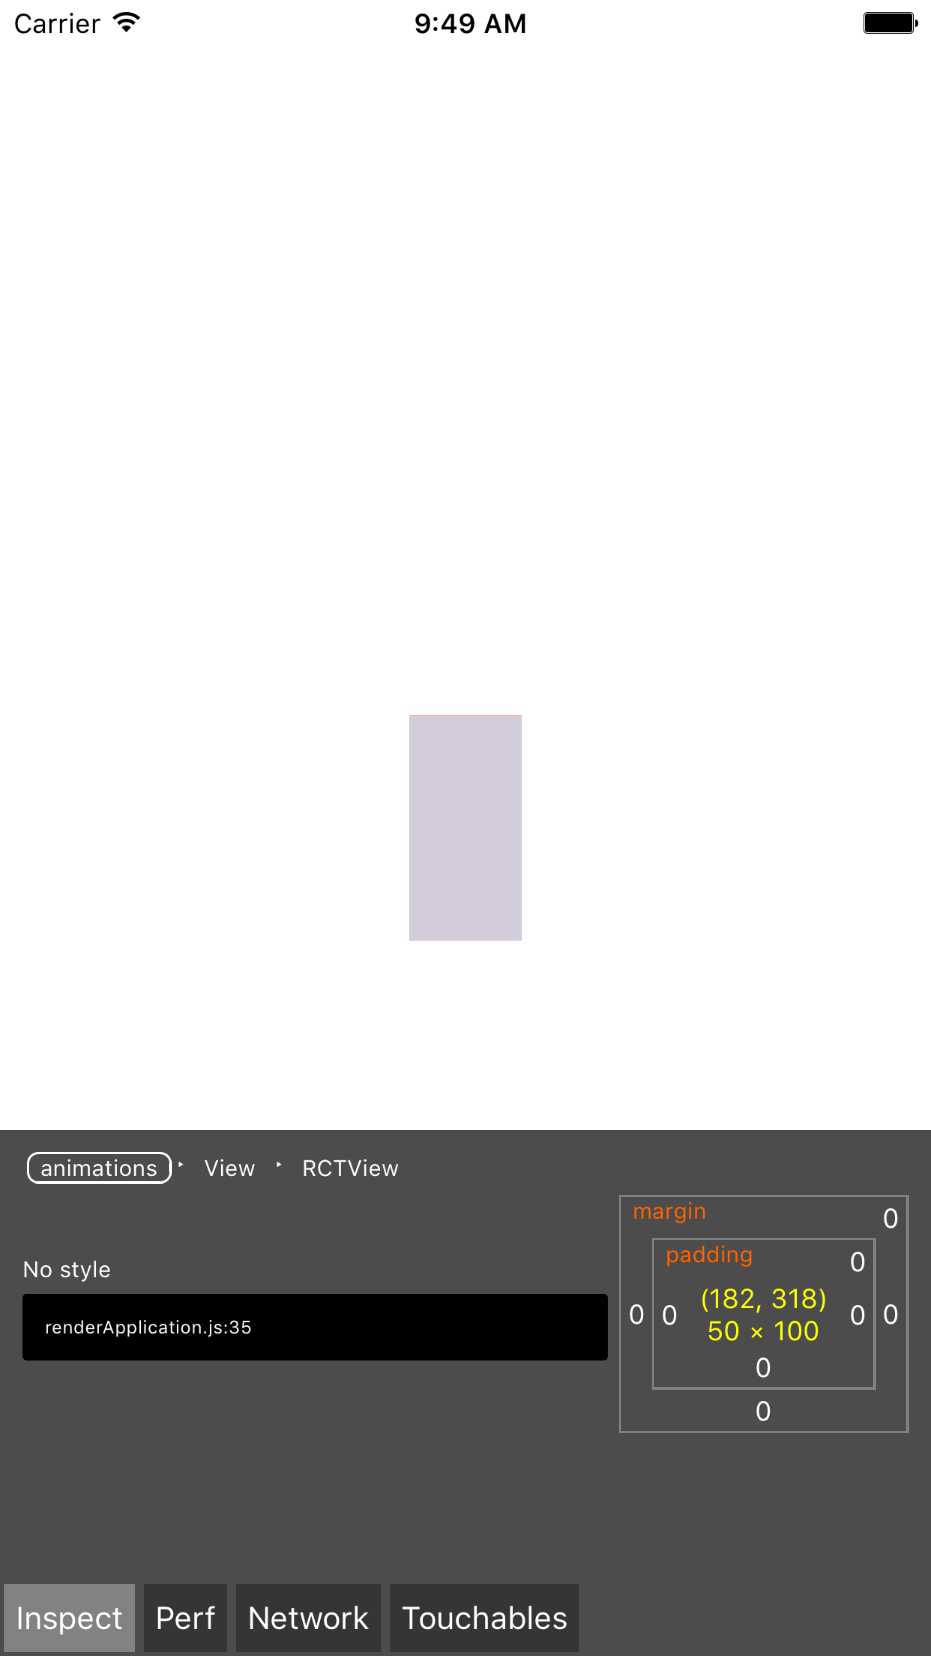
I point this out as you may need to do math based upon the scale for positioning, or making a decision, or anything else you can think of. Understanding that scale transforms from the center, and that you can take the scale value and determine it's new size, you can control your animations correctly.
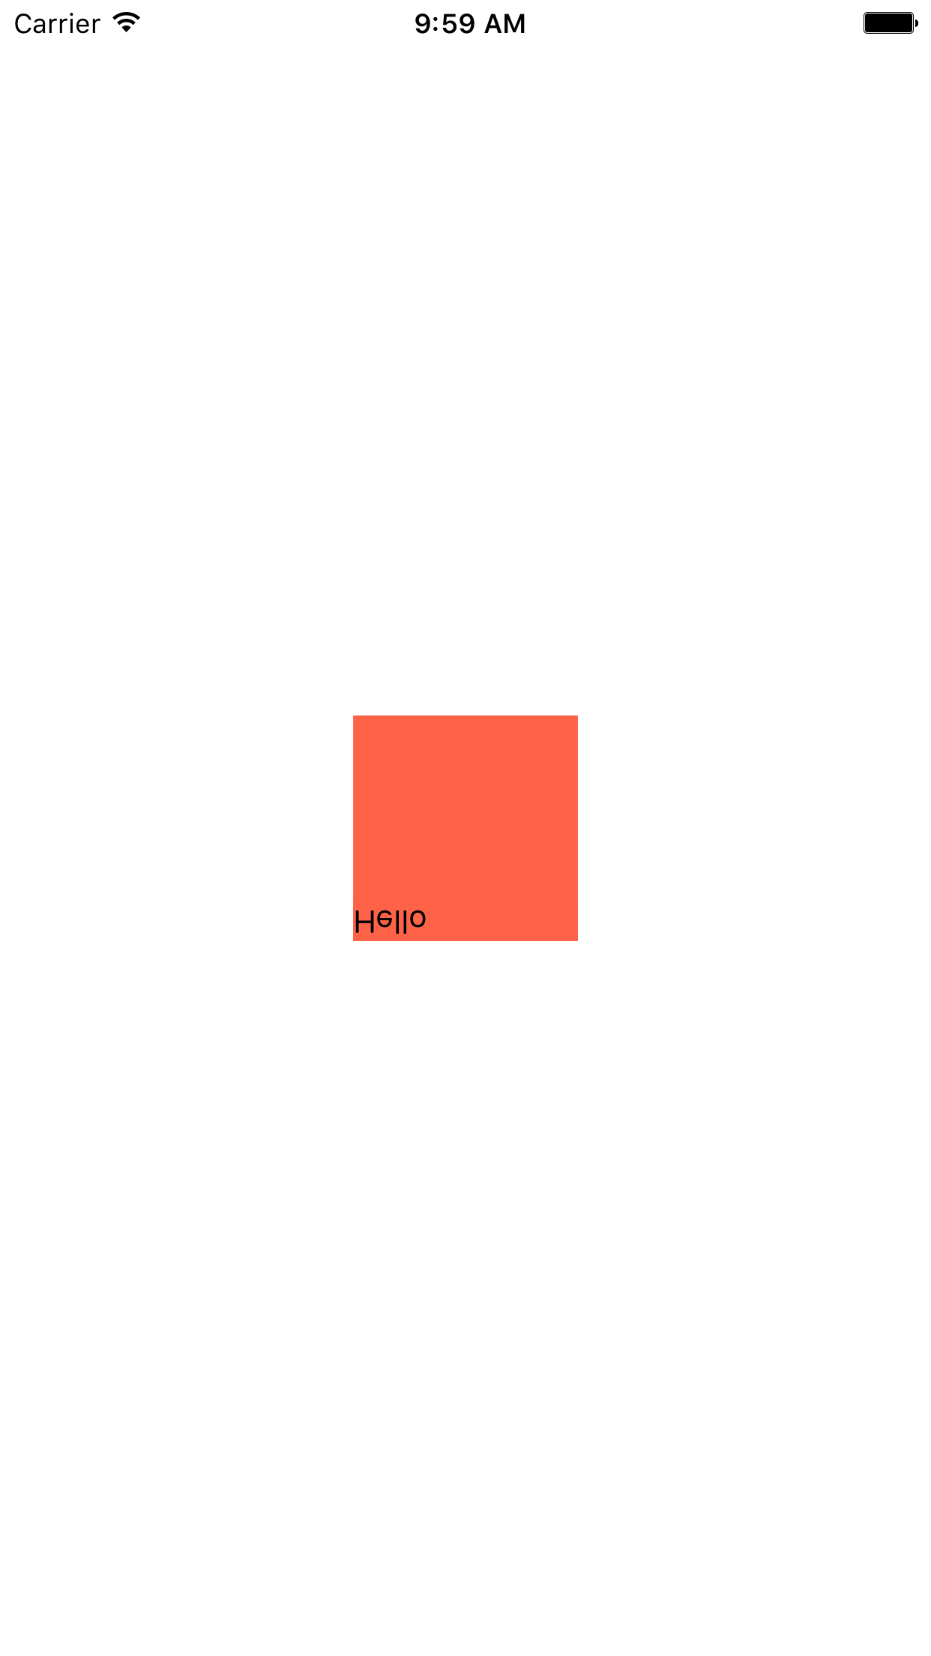
Additionally when scale is negative a point reflection is created. What that means is it will flip over the opposite axis. So if we provide a -1 on scaleY, it will flip over the X axis.
We won't apply this to animation, but it's a good technique to know. This is how libraries like react-native-invertible-scroll-view and react-native-reversed-flat-list have their content set on the bottom. They do a reflection point on the element, and then on each individual row do another reflection point.
Lets take a look at an example of this.
export default class animations extends Component {
  render() {
    return (
      <View style={styles.container}>
        <View>
          <View style={styles.box}>
            <Text>Hello</Text>
          </View>
        </View>
      </View>
    );
  }
}

const styles = StyleSheet.create({
  container: {
    flex: 1,
    alignItems: "center",
    justifyContent: "center",
  },
  box: {
    width: 100,
    height: 100,
    backgroundColor: "tomato",
    transform: [
      {
        scaleY: -1,
      },
    ],
  },
});
We will first use a scaleY: -1 to flip our box over the x axis and relfect it on the other side. You can see that our text is reflected.
Now in order to get a double reflection point we need to apply the same transform and reflect back to the other side. We can apply this to just our text and flip it back to be able to be read normally. We apply a scaleY: -1.
return (
  <View style={styles.container}>
    <View>
      <View style={styles.box}>
        <Text style={styles.textFlip}>Hello</Text>
      </View>
    </View>
  </View>
);

textFlip: {
  transform: [
    {
      scaleY: -1,
    },
  ];
}
Now that it has been reflected we can read it, but our box view still stays reflected which is why our text is still on the bottom.
